Stop Wasting Money on Repairs and Try These 9 Easy DIY Fixes
I’ve always been someone who likes to handle things around the house without calling in a pro. It’s not just about saving money; there’s something really satisfying about fixing up my own home. Plus, knowing how to tackle common household repairs myself gives me a sense of accomplishment.
The good news is that there are plenty of fixes that are super easy to DIY, even if you’re not a handyman. With a little guidance and the right materials, anyone can manage these repairs and avoid extra expenses. By taking on these tasks myself, I feel more self-sufficient and confident in maintaining my home.
Painting a Room for a Fresh Vibe
I’ve always found that painting a room is an easy way to transform its vibe without breaking the bank. I start by picking a color that sparks joy for me. It’s exciting to see how a simple change in color can revitalize the space.
Before getting started, I make sure the room is prepped correctly. This means patching up any cracks or holes in the walls and cleaning the surfaces. Removing old nails and filling in gaps gives me a smooth canvas to work on.
When painting, I like using the tips from Improovy to achieve a professional finish. Using quality brushes and rollers ensures that the paint goes on evenly. Taking my time with each coat and allowing it to dry properly is important for a flawless look.
Unclogging a Toilet with a Plunger
I’ve had my fair share of run-ins with clogged toilets, and a plunger is my go-to solution. It’s an essential tool that can save me from calling a plumber and spending money unnecessarily.
To get started, I make sure to wear rubber gloves and then position the rubber cup of the plunger over the toilet drain. It’s important to get a good seal to ensure effective plunging.
With a firm grip, I push down gently and then pull up sharply. This creates suction to help dislodge the clog. Sometimes, it requires repeating this process a few times before I see results.
If it’s a really stubborn clog, I might use hot water to aid the process. Running hot water over the plunger beforehand can help improve its effectiveness, as I’ve learned from various tips.
For more detailed methods, there are plenty of resources available, like DCM Plumbing’s guide on unclogging a toilet.
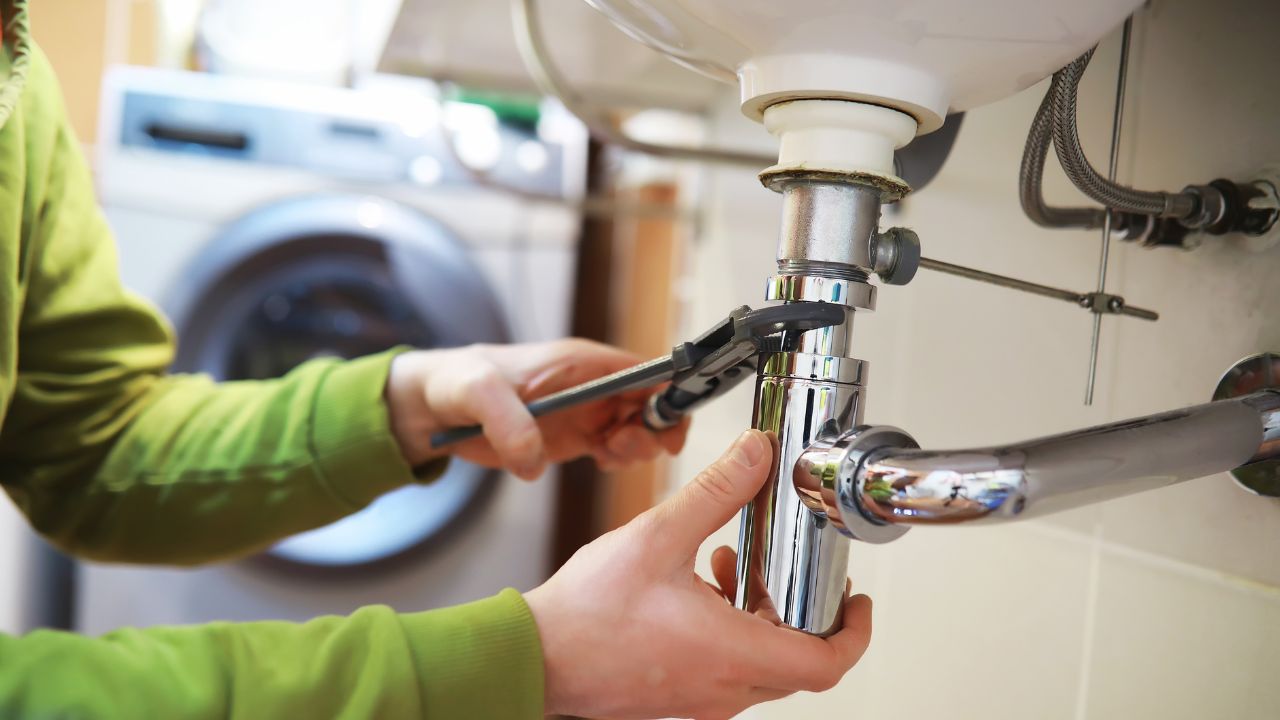
Fixing a Leaky Pipe Under the Sink
I’ve faced my fair share of leaky pipes under the sink. The solution often starts with checking the p-trap. Sometimes, it’s as easy as tightening the p-trap nut carefully to stop minor leaks, as suggested in a Reddit discussion.
For temporary fixes, silicone tape wraps around the pipe can hold you over until you can make a permanent repair. There are times when a patch and clamp can be super handy to fix the leak efficiently. I make sure to turn off the water supply first, which is crucial for avoiding a mess—The Home Depot guide offers some useful steps.
These simple DIY techniques can save both my money and time!
Replacing Burned-Out Light Bulbs
When I notice a bulb isn’t working, my first instinct isn’t to run to the store. Instead, I see if there’s a straightforward fix first. Sometimes an LED light burns out sooner than expected. That’s when checking if the bulb has a warranty is helpful. Public forums often suggest holding on to receipts to make replacements easier.
If curiosity strikes, I also explore methods for fixing the bulb myself. I’ve come across interesting DIY hacks. For instance, an ingenious aluminum foil trick claims to revive LED bulbs.
Ensuring I switch off the power before messing with a fixture is crucial. And if none of these tricks work, replacing that bulb with a new energy-efficient LED might save me trouble in the future.
Changing the Car’s Air Filter
I used to think changing my car’s air filter was a job for the pros. Turns out, it’s shockingly simple.
The air filter keeps dirt and debris from entering the engine. Ensuring it’s clean helps the engine run better.
I saved a lot by doing it myself instead of paying someone else. New filters cost around $10-$20 online. That’s way cheaper than the $30-$60 many dealers charge for installation.
It takes just a few minutes. I pop the hood, locate the filter box, and swap the old filter for a new one. I can even blow out the filter with an air hose for extended life.
Keeping an eye on the air filter has become routine for me, and it’s one of the easiest DIY fixes I tackle to save cash.
Patching Small Holes in Drywall
I’ve found that patching small holes in drywall doesn’t need to be a daunting task. All it takes is some lightweight spackle and a putty knife. I gently fill the small dents and holes with spackle, ensuring they’re completely covered.
For a smoother finish, I make sure to lightly sand the area after the spackle dries. Sometimes, using a metal drywall patch for added support helps, especially if the hole is slightly larger. The whole process quickly restores the wall to a damage-free appearance. It’s a real money-saver compared to hiring a pro.
Sealing Gaps Around Windows
I’ve found that sealing gaps around windows can quickly stop drafts. Using caulk is an easy and low-cost fix. When I spot small gaps, I apply a bead of caulk to fill them, making sure it adheres well.
For larger gaps, I prefer using weatherstripping. It’s more durable and better suited for movable windows. It’s a simple fix that makes a noticeable difference in keeping the warmth inside. Sites like HGTV recommend high-quality caulk for lasting results.
In rentals, I sometimes opt for removable options like rope caulk to avoid any issues with the landlord. Rope caulk is easy to apply and remove, making it renter-friendly as suggested on Reddit. My windows feel cozier once I’ve sealed them properly!
Installing a New Showerhead
Swapping out a showerhead is one of those tasks that sounds complicated, but it’s really straightforward. All I needed was a wrench and some Teflon tape. First, I removed the old showerhead by turning it counterclockwise. If it was stuck, a little extra muscle or a wrench did the trick.
Once the old one was off, I wrapped the threads of the shower arm with a bit of Teflon tape. This helps prevent any leaks. Then, I simply screwed the new showerhead on by hand, turning it clockwise until it was snug. A final gentle turn with the wrench finished the job.
It might seem obvious, but I always double-check for leaks by turning the water on slowly. If everything’s dry, I’m good to go! It’s really as easy as that, and I saved money by doing it myself. For more info, check out some detailed guides like this one from Home Depot.
Swapping Out Old Doorknobs
I’ve swapped out a few doorknobs in my time, and it’s a super easy project. Start by unscrewing the old knob from the back. Keep track of those screws—they love to disappear. Make sure your new knobs match the size of the old ones for a snug fit. For more details on replacing, this guide explains it well.
Once the old knob is off, align the new one and screw it into place. The first time I did this, I was amazed at how instantly my doors looked refreshed. If you’ve got antique hardware, don’t just toss it. You might be able to fix them up instead.